


Table of contents
- TerraWeek Day 1/7
- Day 1: Introduction to Terraform and Terraform Basics
- What is Terraform and how can it help you manage infrastructure as code?
- Why do we need Terraform and how does it simplify infrastructure provisioning?
- How can you install Terraform and set up the environment for AWS, Azure, or GCP?
- Explain the important terminologies of Terraform with the example of at least (5 crucial terminologies).
TerraWeek Day 1/7
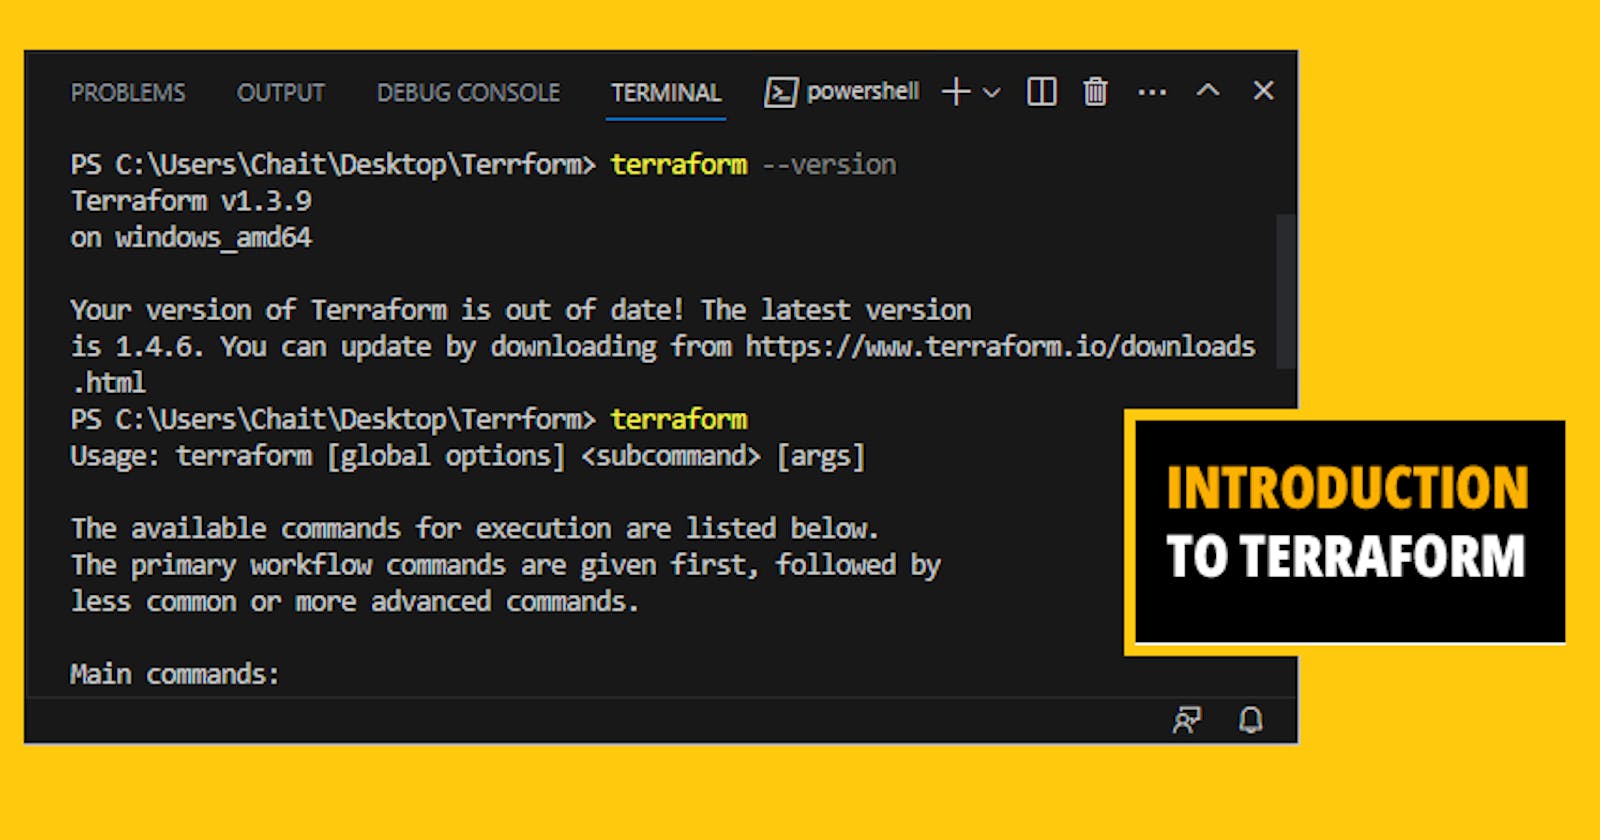
Day 1: Introduction to Terraform and Terraform Basics
What is Terraform and how can it help you manage infrastructure as code?
Terraform is an open-source infrastructure as a code tool that can help in provisioning, changing, and versioning infrastructure efficiently. It allows us to define infrastructure and application resources as code. With code, infrastructure can be managed and automated consistently across different environments.
How does terraform help in infrastructure management as code--->
- Terraform provides a declarative language that allows you to define your infrastructure as code so that you can create, modify, and version your infrastructure easily.
Terraform uses HCL or HashiCorp Configuration Language to write infrastructure as code. HCL is designed to be easy to read and write and supports complex data structures like nested blocks, maps, and lists.
Here is a brief overview of the syntax used in HCL:
a. Comments: Comments can be added to the code using the hash symbol #.
# This line is a comment
b. Blocks: HCL uses blocks to group related configurations together. A block starts with a block type followed by a label and is then followed by a set of curly braces.
block_type "label" {
  # Configuration settings
}
c. Attributes: Attributes are key-value pairs that define the configuration of a block. They are specified within the curly braces of a block.
block_type "label" {
  attribute_name = "value"
  another_attribute = 123
}
d. Strings: Strings are surrounded by double quotes.
message = "Hello, world!"
e. Numbers: Numbers can be specified as integers or floating-point numbers.
count = 10
pi = 3.14159
f. Variables: HCL supports variables, which are defined using the variable keyword followed by a name, an optional description, and a default value.
variable "name" {
  description = "Description of the variable"
  default     = "default value"
}
g. Expressions: HCL supports expressions, which are denoted by ${}. These expressions can be used to reference variables, interpolate strings, and perform calculations.
message = "Hello, ${var.name}!"
sum = ${1 + 2}
Note that these are just some basic examples, and HCL supports a lot more in terms of syntax and usage depending on the tool it is used with.
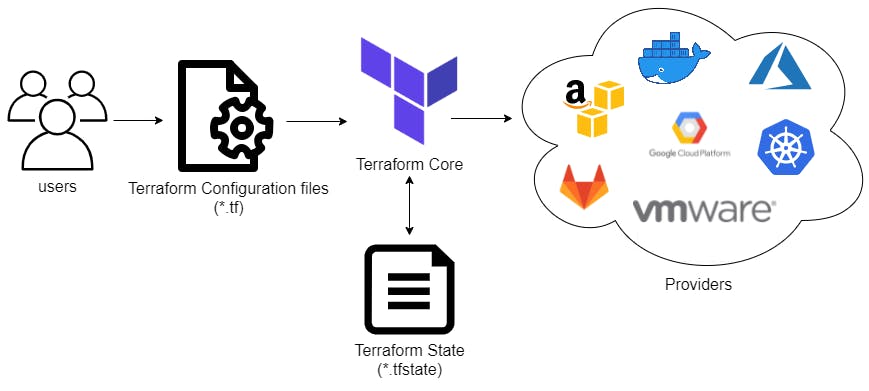
- Terraform supports multiple infrastructure providers including AWS, Azure, GCP, etc. With Terraform, you can write infrastructure code that is vendor agnostic.
# Specify the provider you want to use
provider "aws" {
  access_key = "ACCESS_KEY"
  secret_key = "SECRET_KEY"
  region     = "us-east-1"
}
# Define an AWS instance
resource "aws_instance" "example" {
  ami           = "ami-0c55b159cbfafe1f0"
  instance_type = "t2.micro"
}
# Specify the provider you want to use
provider "google" {
  project = "google-project-id"
  region  = "us-central1"
}
# Define a Google Cloud instance
resource "google_compute_instance" "example" {
  name         = "example"
  machine_type = "n1-standard-1"
}
- Since Terraform is infrastructure as code, you can apply all software development best practices like version control, automated testing, code review, and continuous integration and delivery to your infrastructure.
Why do we need Terraform and how does it simplify infrastructure provisioning?
We need Terraform to simplify infrastructure provisioning because manual provisioning and management of infrastructure can be a slow and error-prone process, especially when managing complex systems or employing a multi-cloud strategy.
Terraform is a tool that provides a declarative syntax for describing infrastructure resources and automates the provisioning and management of resources across multiple cloud providers.
Terraform simplifies infrastructure provisioning in several ways:
Declarative syntax: Terraform provides a declarative syntax for defining infrastructure resources, which makes it easier to reason about and manage infrastructure as code.
Automated provisioning and management: Terraform automates the provisioning and management of infrastructure, which reduces manual errors and speeds up the process of provisioning resources.
cloud-agnostic: Terraform is cloud-agnostic, meaning it can be used with multiple cloud providers, giving teams the ability to adopt a multi-cloud strategy without sacrificing productivity.
State management: Terraform maintains a state file that tracks the state of all the resources it manages. With this state file, Terraform can calculate the changes necessary to reach the desired state and apply only those changes necessary to make updates.
Reusable modules: Terraform allows provisioning code to be reused. Modules can be shared between multiple Terraform configurations, allowing for easy replication of infrastructure and sharing of best practices between projects and teams.
Overall, Terraform simplifies infrastructure provisioning because it enables teams to declare, manage, and automate infrastructure in a consistent and repeatable manner, across multiple cloud providers.
How can you install Terraform and set up the environment for AWS, Azure, or GCP?
https://developer.hashicorp.com/terraform/downloads
To install Terraform on Linux OS, follow these steps: https://developer.hashicorp.com/terraform/tutorials/aws-get-started/install-cli
sudo apt-get update && sudo apt-get install -y gnupg software-properties-common

wget -O- https://apt.releases.hashicorp.com/gpg | \
gpg --dearmor | \
sudo tee /usr/share/keyrings/hashicorp-archive-keyring.gpg

gpg --no-default-keyring \
--keyring /usr/share/keyrings/hashicorp-archive-keyring.gpg \
--fingerprint

echo "deb [signed-by=/usr/share/keyrings/hashicorp-archive-keyring.gpg] \
https://apt.releases.hashicorp.com $(lsb_release -cs) main" | \
sudo tee /etc/apt/sources.list.d/hashicorp.list

sudo apt update

sudo apt-get install terraform

# Verify the installation

terraform --version
Set up the environment for AWS, Azure, and GCP--->
AWS:
- Create an AWS account if you do not have one already.
https://repost.aws/knowledge-center/create-and-activate-aws-account
- Create an IAM user with programmatic access and attach the necessary permissions to access and manipulate your AWS resources.
Create an access key and secret key for the IAM user and note them down.
Export the AWS access key and secret key as environment variables.
For Linux and macOS, you can do this by executing the following commands, replacing the values with your access key and secret key:
export AWS_ACCESS_KEY_ID="your_aws_access_key"
export AWS_SECRET_ACCESS_KEY="your_aws_secret_key"
For Windows, you can do this by executing the following commands, replacing the values with your access key and secret key:
setx AWS_ACCESS_KEY_ID YOUR_ACCESS_KEY_ID
setx AWS_SECRET_ACCESS_KEY YOUR_SECRET_ACCESS_KEY
Azure:
Create an Azure account if you do not have one already.
Create a service principal with the necessary permissions to access and manipulate your Azure resources.
Note down the Azure subscription ID, client ID (also known as application ID), client secret (also known as password), and tenant ID.
Export the Azure subscription ID, client ID, client secret, and tenant ID as environment variables. For Linux and macOS, you can do this by adding the following lines to your .bashrc or .bash_profile file, replacing the values with your own subscription ID, client ID, client secret, and tenant ID:
export ARM_SUBSCRIPTION_ID="your_subscription_id"
export ARM_CLIENT_ID="your_client_id"
export ARM_CLIENT_SECRET="your_client_secret"
export ARM_TENANT_ID="your_tenant_id"
GCP:
Create a GCP account if you do not have one already.
Set up the appropriate permissions to access and manipulate your GCP resources.
Create a new service account key and note down the downloaded key file's path.
Export the GCP service account key as an environment variable. For Linux and macOS, you can do this by running the following command, replacing the path/to/service-account-key.json with the actual path and filename of your service account key file:
export GOOGLE_CREDENTIALS=$(cat path/to/service-account-key.json)
With your environment variables set up, you can now use Terraform to provision and manage your AWS, Azure, or GCP resources.
Explain the important terminologies of Terraform with the example of at least (5 crucial terminologies).
Here are five important terminologies in Terraform, along with an example to explain each one:
- Infrastructure as Code (IaC): This refers to the practice of representing infrastructure as code rather than manually creating and configuring resources. In Terraform, infrastructure is described using HCL (HashiCorp Configuration Language).
Below is a sample Terraform configuration file that demonstrates how to provision an EC2 instance with a web server using Terraform from code-->
provider "aws" {
  region = "us-east-1"
}

resource "aws_instance" "mywebserver" {
  ami           = "ami-0c94855ba95c71c99"  # Update with your desired AMI ID
  instance_type = "t2.micro"  # Update with your desired instance type

  tags = {
    Name = "web-server-instance"
  }

  key_name = "your-key-pair"  # Update with your EC2 key pair name

  user_data = <<-EOF
    #!/bin/bash
    sudo apt update
    sudo apt install -y apache2
    sudo systemctl enable apache2
    sudo systemctl start apache2
  EOF
}

output "public_ip" {
  value       = aws_instance.mywebserver.public_ip
  description = "Public IP address of the EC2 instance"
}
In this terraform script/ configuration file, we're creating an AWS EC2 instance and configuring it as a web server.
- Resource: A resource is a single object that Terraform manages. It represents a particular component of infrastructure in the provider being used. In the example above, aws_instance is a resource. Within each resource block, you can define attributes and settings specific to that resource.
For example, an EC2 instance resource may have attributes like ami (Amazon Machine Image), instance_type, subnet_id, and tags.
resource "aws_instance" "appserver" {
  ami           = "ami-12345678"   # your desired AMI ID
  instance_type = "t2.micro"
  subnet_id     = "subnet-12345678"   # your desired subnet ID

  tags = {
    Name        = "appInstance"
    Environment = "Production"
  }
}
- Provider: A provider is a plugin responsible for interacting with a specific cloud or service. It helps to manage resources on a particular platform with Terraform. Here is how to specify the AWS provider in your Terraform file:
provider "aws" {
  access_key = "ACCESS_KEY"
  secret_key = "SECRET_KEY"
  region     = "us-east-1"
}
State: State is a snapshot of the infrastructure created by Terraform. It enables Terraform to know the current state of your infrastructure and what it needs to change to get to the desired state. By keeping track of all the resources, data sources, and providers in the infrastructure configuration, it becomes easy to manage the infrastructure. Terraform state is stored locally by default in a file named terraform.tfstate.
Module: Modules are used to organize the Terraform code into reusable units. You can make a module from a set of Terraform resources. These modules can be shared for use in other Terraform configurations, and their configuration can be changed using input variables to create different resource instances. Here's an example of how to call a module in a Terraform configuration:
module "webserver" {
  source = "./modules/webserver"
  instance_count = 2
  instance_type = "t2.micro"
}
In this example, we're calling a module named webserver that exists in the directory ./modules/webserver. The module takes two input variables: instance_count and instance_type. Terraform will use the module to create two instances of the aws_instance resource with the specified instance_type.
I hope this explanation helps you understand some of the important terminologies in Terraform.
#TrainWithShubham #TerraWeek Challenge
I hope you learned something today with me!

Stay tuned for my next blog on "Day2 of Terraweek Challenge". I will keep sharing my learnings and knowledge here with you.
Let's learn together! I appreciate any comments or suggestions you may have to improve my learning and blog content.
Thank you,
Chaitannyaa Gaikwad