Step-by-Step Guide: Installing, Setting Up, and Deploying Applications on Kubeadm

Aspiring DevOps Engineer, Certified AWS Solutions Architect - Associate
Kubeadm is a tool that helps you bootstrap a Multi-node Kubernetes cluster quickly and easily. It automates many of the manual steps involved in setting up a cluster, such as configuring the Kubernetes control plane and joining nodes to the cluster. Kubeadm is designed to be as simple as possible, making it easy to use even for those who are new to Kubernetes.
Once you have your cluster up and running, you need to start deploying applications on it. Kubernetes provides a powerful platform for managing containerized applications, with features like automatic scaling, rolling updates, and self-healing. By deploying applications on Kubeadm, you can take advantage of these features to ensure that your applications are highly available, scalable, and resilient.
In this blog, we'll walk you through the process of installing, setting up, and deploying applications on Kubeadm. we'll cover the basics of Kubernetes objects and show you how to create and configure deployment and service objects.
Prerequisites
A compatible Linux host. [In my case: Debian-based]
4 GB or more of RAM and 2 CPUs or more for the master node
2 GB or more of RAM and 1 CPU or more for the worker node
Let's start with installation--->
Step 1: Make at least three machines/nodes to form a multi-node Kubernetes cluster.


Step 2: Install Kubeadm on all nodes.
Installation commands to run on different nodes

Both Master & Worker Node---->sudo apt update -y
sudo apt install docker.io -y
sudo systemctl start docker
sudo systemctl enable docker
sudo curl -fsSLo /usr/share/keyrings/kubernetes-archive-keyring.gpg https://packages.cloud.google.com/apt/doc/apt-key.gpg
echo "deb [signed-by=/usr/share/keyrings/kubernetes-archive-keyring.gpg] https://apt.kubernetes.io/ kubernetes-xenial main" | sudo tee /etc/apt/sources.list.d/kubernetes.list
sudo apt update -y
sudo apt install kubeadm kubectl kubelet -y
On master node--->
sudo su
kubeadm init
mkdir -p $HOME/.kube
sudo cp -i /etc/kubernetes/admin.conf $HOME/.kube/config
sudo chown $(id -u):$(id -g) $HOME/.kube/config
kubectl apply -f https://github.com/weaveworks/weave/releases/download/v2.8.1/weave-daemonset-k8s.yaml
kubeadm token create --print-join-command [Copy the output to paste on worker nodes]
On worker node--->
sudo su
kubeadm reset pre-flight checks
-----> Paste the Join command on the worker node and ADD --v=5 at end

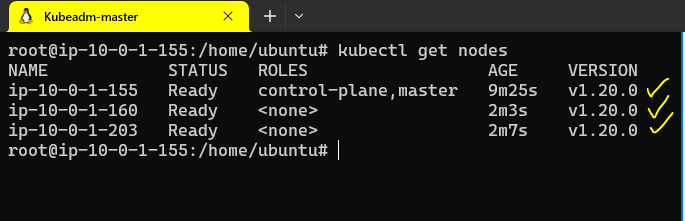
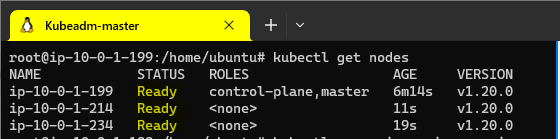
Step 3: Verify cluster connection and nodes availability
On Master Node
kubectl get nodes
Step 4: Assign Roles and Labels to the Nodes
Assign role to the nodes--->
kubectl label node [Name-of-Node] node-role.kubernetes.io/worker=worker

Assign labels to the nodes--->
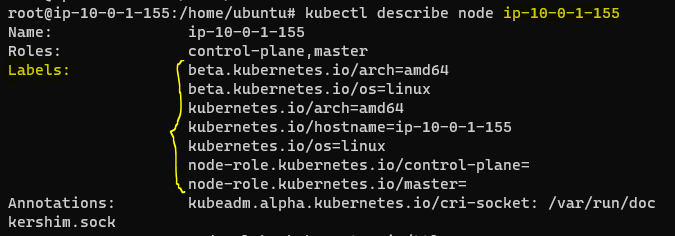
kubectl get nodes

kubectl describe node ip-10-0-1-155
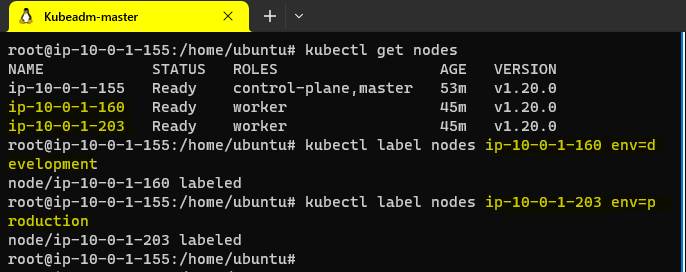
kubectl label nodes <node-name> <label-key>=<label-value> env: development
kubectl label nodes ip-10-0-1-160 env=development
kubectl label nodes ip-10-0-1-203 env=production

Step 5: Get the deployment files ready on the master node and read the deployment files for "nodeSelector" for pods
Get the deployment files to the master node--->
git clone https://github.com/Chaitannyaa/Kubeadm-k8s-simple-calculator-deployment.git

Check the general-deployment.yml and nodePort-service.yml file--->


Create a namespace named "test" to work in that for this deployment--->

Step 6: Apply deployment.yml and service.yml
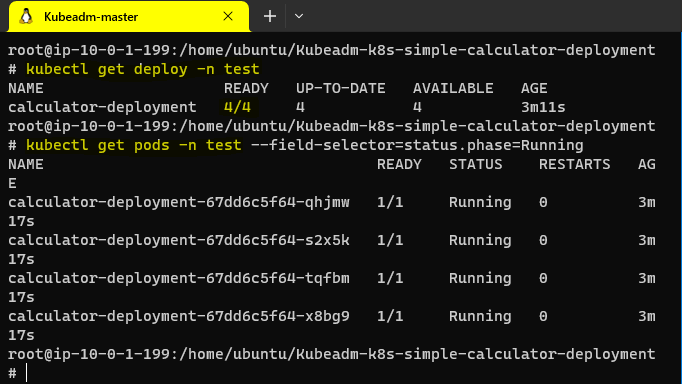
Apply general-deployment and nodePort-service files--->

Check pods are distributed and running on worker nodes--->


Step 7: Let's run node-specific deployments using the "nodeSelector"
We have two worker nodes--->
Each node with a separate label to select for particular deployment using nodePort selector--->
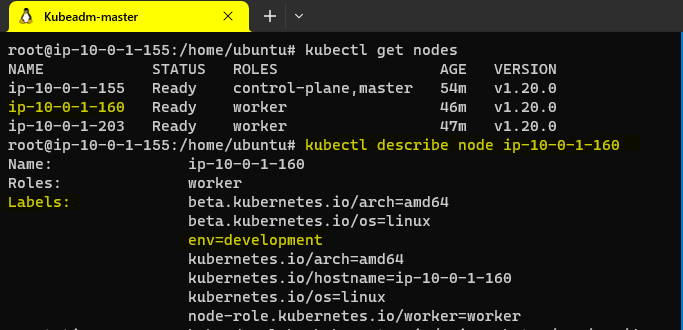
kubectl describe node ip-10-0-1-160

Above is the worker node with the label "env=development" so this node will be utilized for deployments or other objects allocation when we mention this label.
Check "dev-deployment.yml" for "nodeSelector"--->
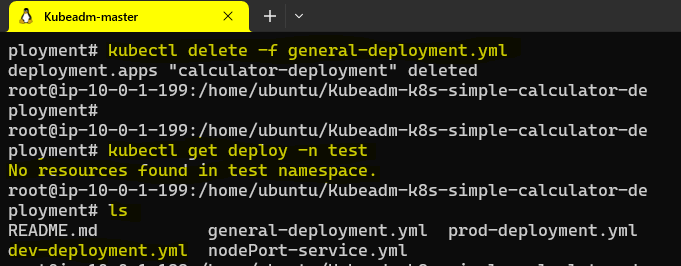

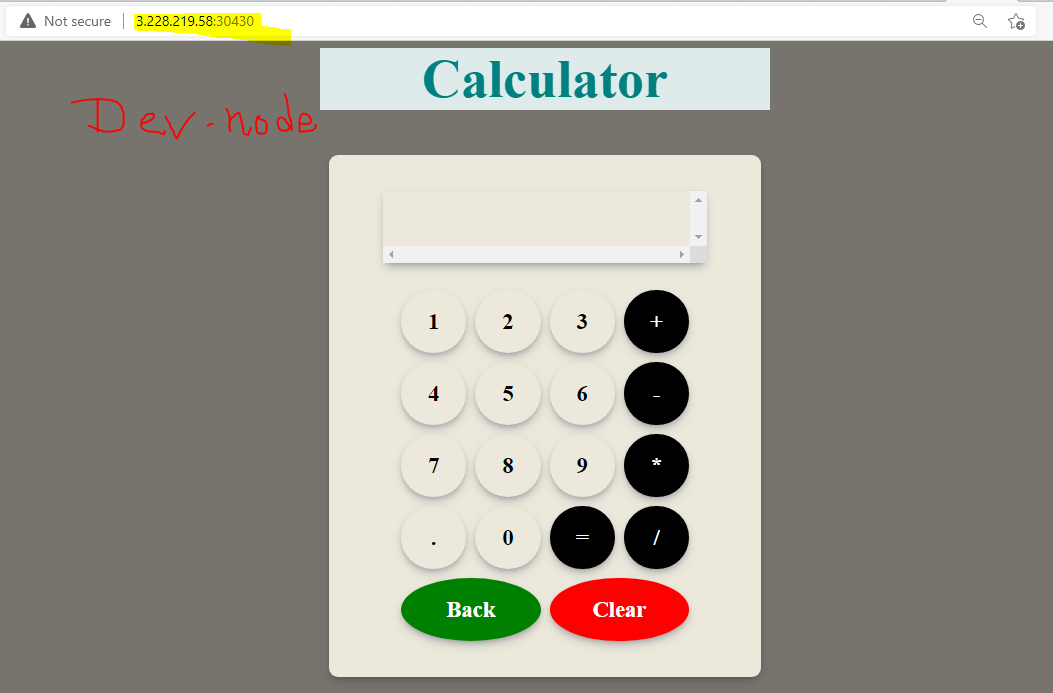
Apply the "dev-deployment.yml" and check that node for pod replicas and access the app on that nodeport--->
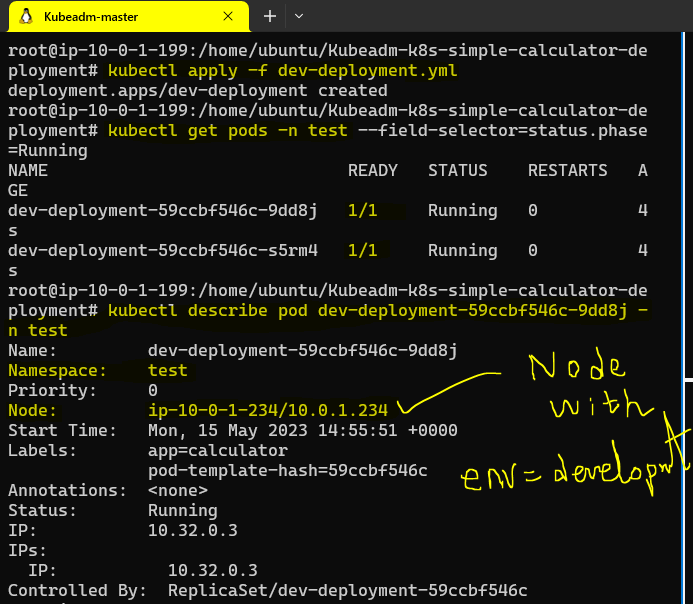

Similarly, you can check for another worker node with the prod-deployment.yml file and can have node-specific deployments also in the Kubernetes cluster
Summary:
In this blog article, we learned the Kubeadm tool that simplifies the setup of a multi-node Kubernetes cluster. It automates manual steps and allows for easy deployment of applications. By installing Kubeadm on compatible Linux hosts and following the provided commands, users can quickly create a cluster. The process involves initializing the master node, joining worker nodes, verifying the cluster connection, assigning roles and labels to nodes, and deploying applications using deployment and service files.
The master node distributes deployments/workloads across available nodes. Node-specific deployments can be achieved by using nodeSelector configurations. Kubeadm streamlines the setup and deployment process, making it accessible even for those new to Kubernetes.
I hope you learned something today with me!

Stay tuned for my next blog on "Amazon Web Services". I will keep sharing my learnings and knowledge here with you.
Let's learn together! I appreciate any comments or suggestions you may have to improve my learning and blog content.
Thank you,
Chaitannyaa Gaikwad


