From Code to Deployment Using CICD Pipeline: My Jenkins Project

Aspiring DevOps Engineer, Certified AWS Solutions Architect - Associate
Why use Continuous Integration and Continuous Delivery/Deployment?
Continuous Integration and Continuous Delivery (CICD) are crucial aspects of software development that help teams build, test, and deploy software quickly and efficiently.
Continuous Integration involves automatically building and testing code changes as they are committed to a shared code repository. This ensures that code is stable and working as expected, and helps catch errors early in the development process.
Continuous Delivery involves automatically deploying code changes to a staging or production environment, where it can be tested by users and stakeholders. This helps speed up the release process and allows for more frequent updates to the software.
Together, CICD helps ensure that software is delivered faster, with higher quality, and at a lower cost. It enables teams to detect and fix bugs earlier, reduce the risk of errors in production, and deliver features and updates more frequently.
What is CICD Pipeline?
A CICD pipeline is a process or set of processes that automate the building, testing, and deployment of software changes from development to production.

The CICD pipeline starts with the integration of code changes into a shared code repository. Then, the pipeline automatically builds the changes, runs automated tests to ensure the code is working as expected, and deploys the changes to a staging or production environment for further testing or release.
This blog explains how to set up a Jenkins CICD pipeline for a multi-container microservices application using Docker and Docker Compose. The pipeline involves building the source code from a GitHub repository, creating Docker images, deploying the application to multiple servers, and updating the Docker registry with versioned images. The pipeline also sends notification emails to relevant personnel about the deployment status and performs cleanup tasks on the hosting server.
Project Overview
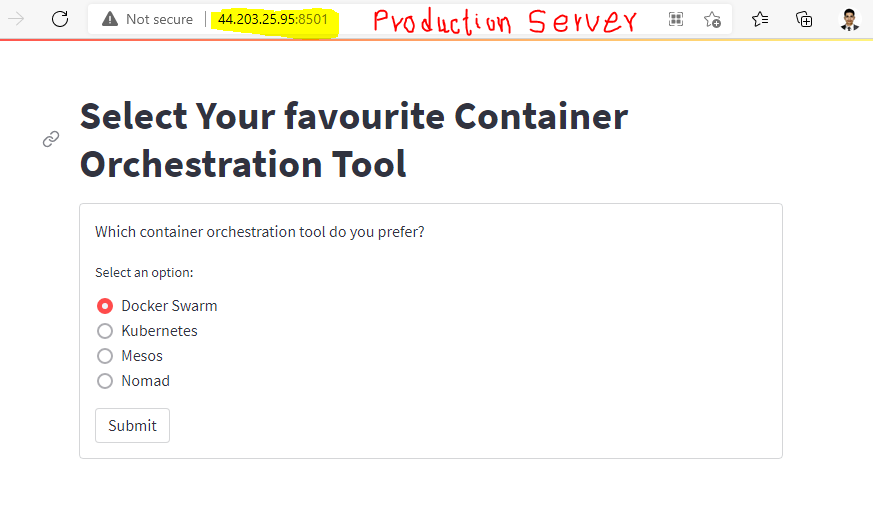
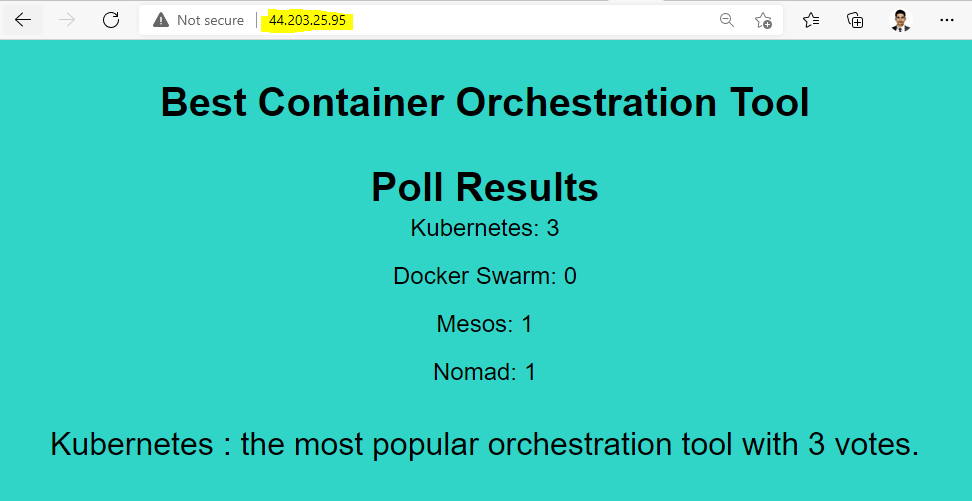
Our project is a microservice-based web application that consists of five different services: Redis, Postgres DB, Vote App, Worker App, and Result App. The purpose of the application is to allow users to vote for their preferred option and display the results of the poll in real-time.
To automate the deployment process of this application, we have set up a CI/CD pipeline using Jenkins. The pipeline consists of several stages, including code checkout, building Docker images, deploying services to different servers using Docker Compose, updating the Docker registry, sending notification emails to the concerned person, and performing cleanup tasks on the hosting server.
By setting up this pipeline, we aim to streamline the deployment process of our microservice application and ensure that each new change to the codebase is automatically deployed to the production/ testing/ development environment. This approach will save us time and effort while ensuring the reliability and scalability of our application.
Pre-requisites
A GitHub account to store the source code.
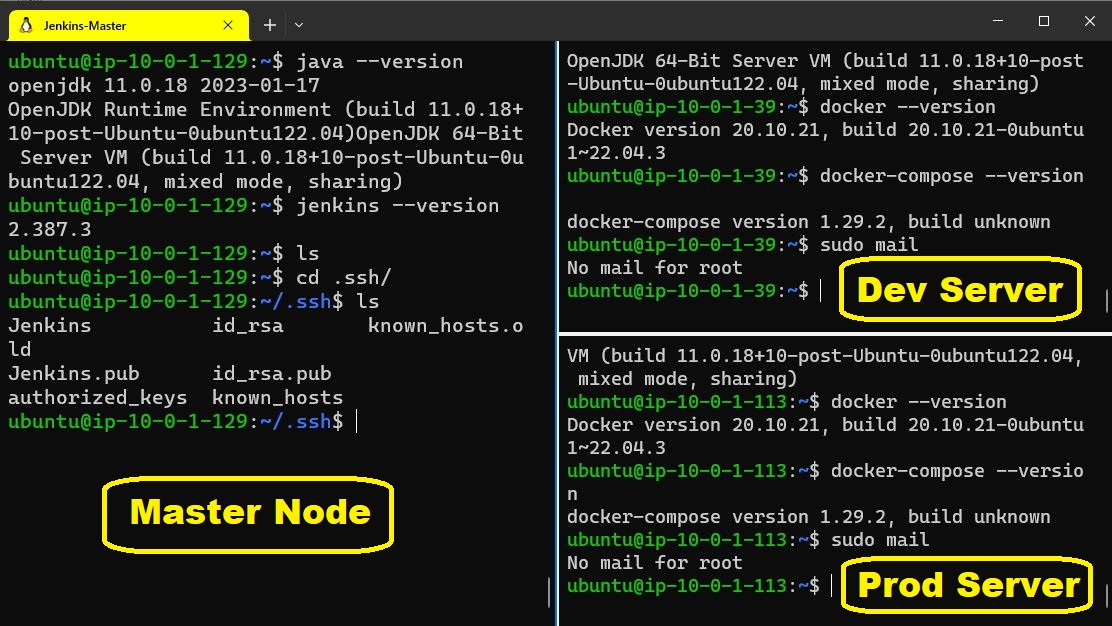
Three servers/machines :
a) Jenkins Master Node
b) Jenkins Agent Node-1 [For development/testing environment]
c) Jenkins Agent Node-2 [For production environment]
Jenkins, Docker and Docker Compose are installed.
Docker registry to store the Docker-versioned images.
Knowledge of Groovy syntax to create the Jenkins pipelines.
Let's get started--->
Step 1: Get the source code of this Microservice App
Fork this repo:
https://github.com/Chaitannyaa/Jenkins-Project.git
Step 2: Make three servers ready for deployment purposes
Create ec2 instances, one as the master node and the other as Agent nodes for deployment purposes.
Instances can be t2-micro, 1 CPU, 1 GiB Memory, and ports 8080, 80, 22, 8501 are open to allow incoming traffic

Step 3: Setup these servers to use Jenkins
Jenkins Master Node must have Jenkins installed.
Jenkins Agent nodes must have Java, docker, docker-compose, and mail utility installed and configured.
Learn more >> for Java and docker installation
sudo apt install docker-compose -yfor docker-compose installationLearn more >> for mail utility installation and configuration
Access your Jenkins on
http://Localhost[master-node]:8080
Add agent nodes to the Jenkins Master server/node

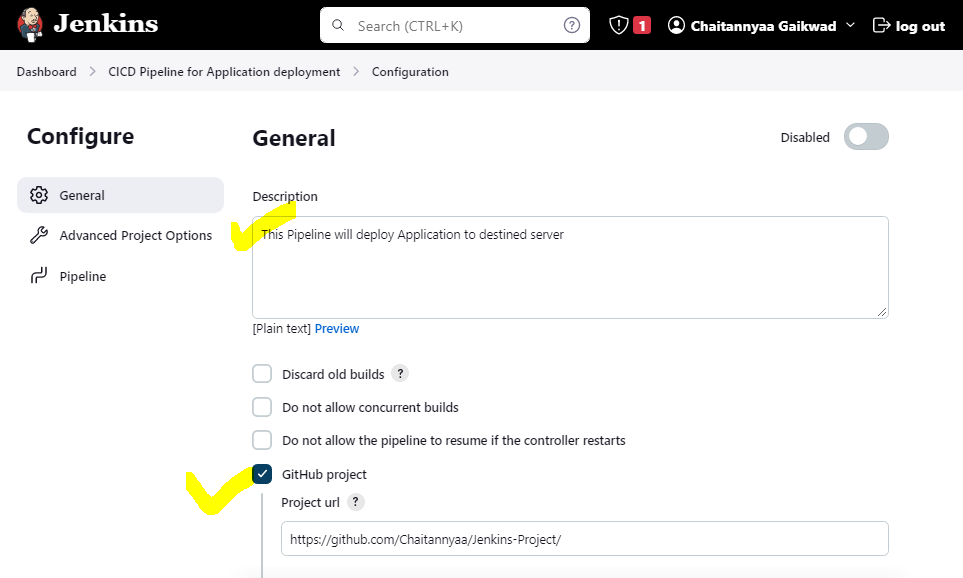
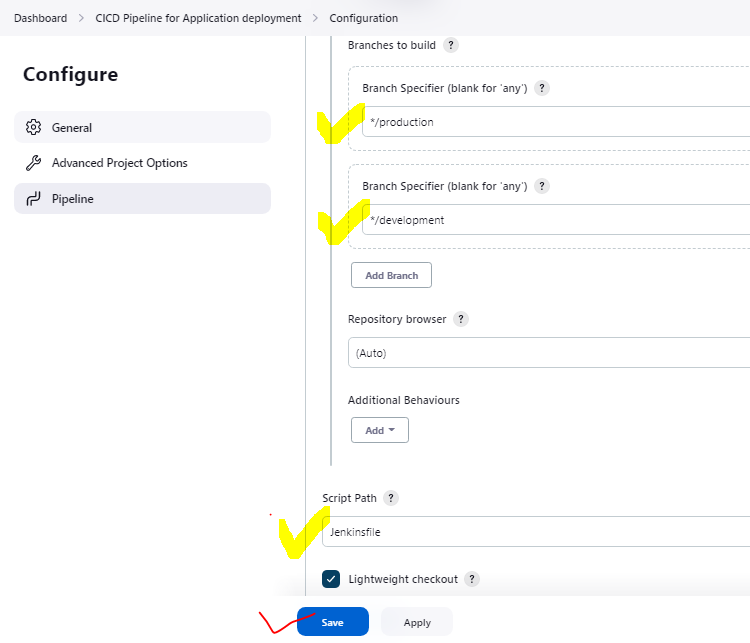
Step 4: Create a Jenkins Pipeline project


Step 5: Set the GitHub webhook to trigger the project pipeline
Go to the GitHub repository that you forked in Step 1 -->
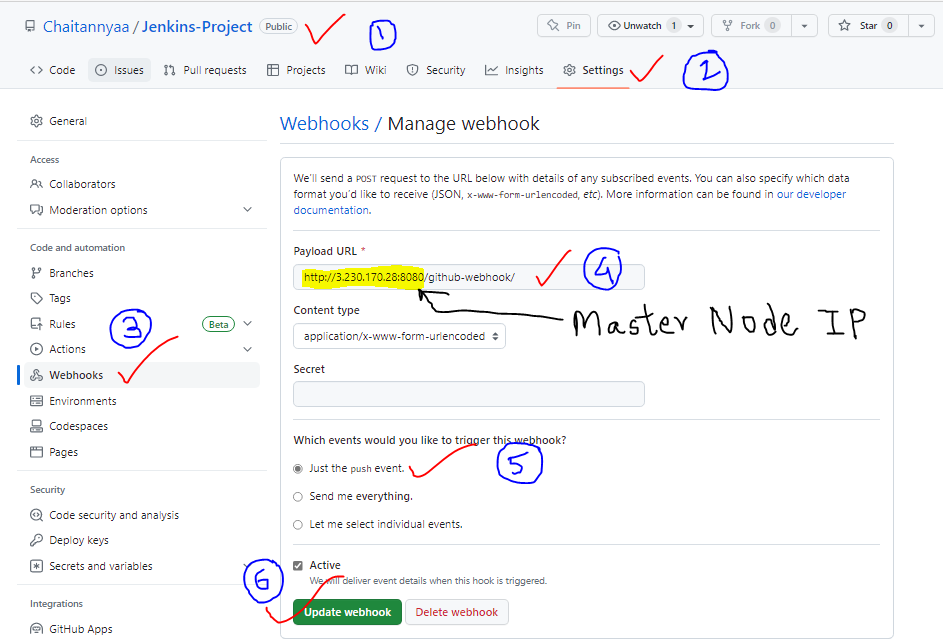
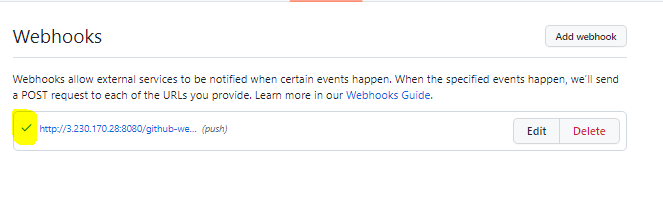
If you find a tick mark then you are done!
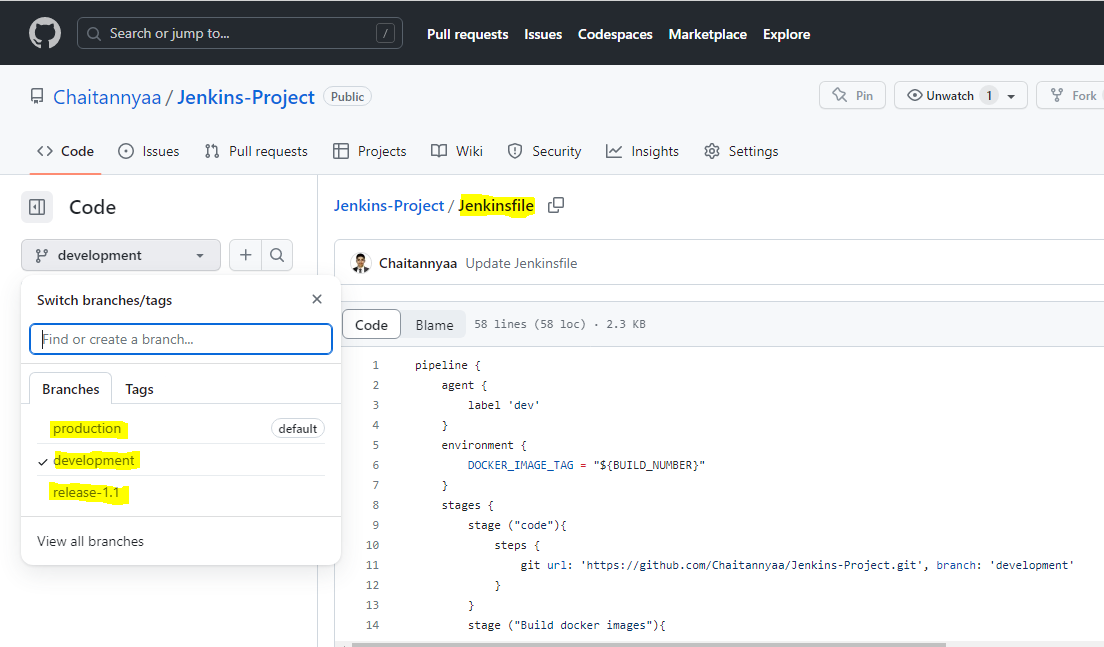
Step 6: Create a Jenkinsfile for our pipeline to run
We have three branches for this project
pipeline {
agent {
label 'dev'
}
environment {
DOCKER_IMAGE_TAG = "${BUILD_NUMBER}"
}
stages {
stage ("code"){
steps {
git url: 'https://github.com/Chaitannyaa/Jenkins- Project.git', branch: 'development'
}
}
stage ("Build docker images"){
steps {
sh 'docker build -t chaitannyaa/multi_container_app:worker-D-${DOCKER_IMAGE_TAG} ./worker'
sh 'docker build -t chaitannyaa/multi_container_app:result-D-${DOCKER_IMAGE_TAG} ./result'
sh 'docker build -t chaitannyaa/multi_container_app:vote-D-${DOCKER_IMAGE_TAG} ./vote'
}
}
stage("Deploy services"){
steps {
sh "docker-compose down && docker-compose up -d"
}
}
stage ("Update docker images"){
steps {
echo 'Logging into docker and pushing an image on dockerhub'
withCredentials([usernamePassword(credentialsId: 'DockerHub', passwordVariable: 'password', usernameVariable: 'user')]) {
sh "docker login -u ${env.user} -p ${env.password}"
sh "docker push chaitannyaa/multi_container_app:worker-D-${DOCKER_IMAGE_TAG}"
sh "docker push chaitannyaa/multi_container_app:result-D-${DOCKER_IMAGE_TAG}"
sh "docker push chaitannyaa/multi_container_app:vote-D-${DOCKER_IMAGE_TAG}"
}
}
}
stage('Notify Management team') {
steps {
// Send a notification email to the team
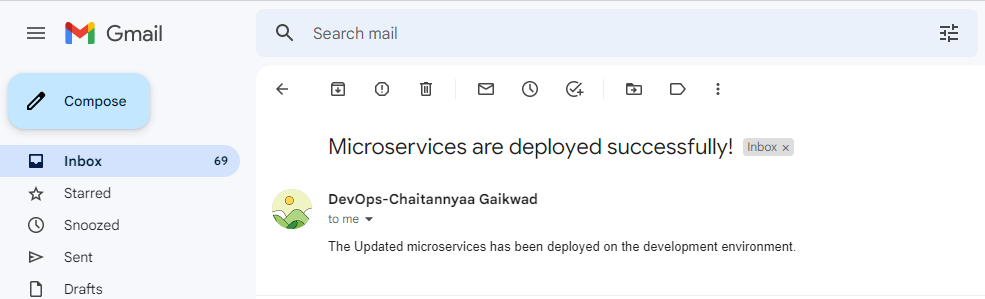
sh 'echo "The Updated microservices has been deployed on the development environment." | mail -s "Microservices are deployed successfully!" -a "From: DevOps-Chaitannyaa Gaikwad" chaitannyaagaikwad@gmail.com'
}
}
stage("Clean-up"){
steps {
sh '''
set +e
docker rmi -f $(docker images -a -q)
if [ $? -eq 0 ]; then
echo "All Docker images have been removed successfully."
else
echo "Error: Could not remove all Docker images."
fi
set -e
'''
}
}
}
}
This Jenkinsfile automates the build, deployment, and cleanup process for a multi-container application.
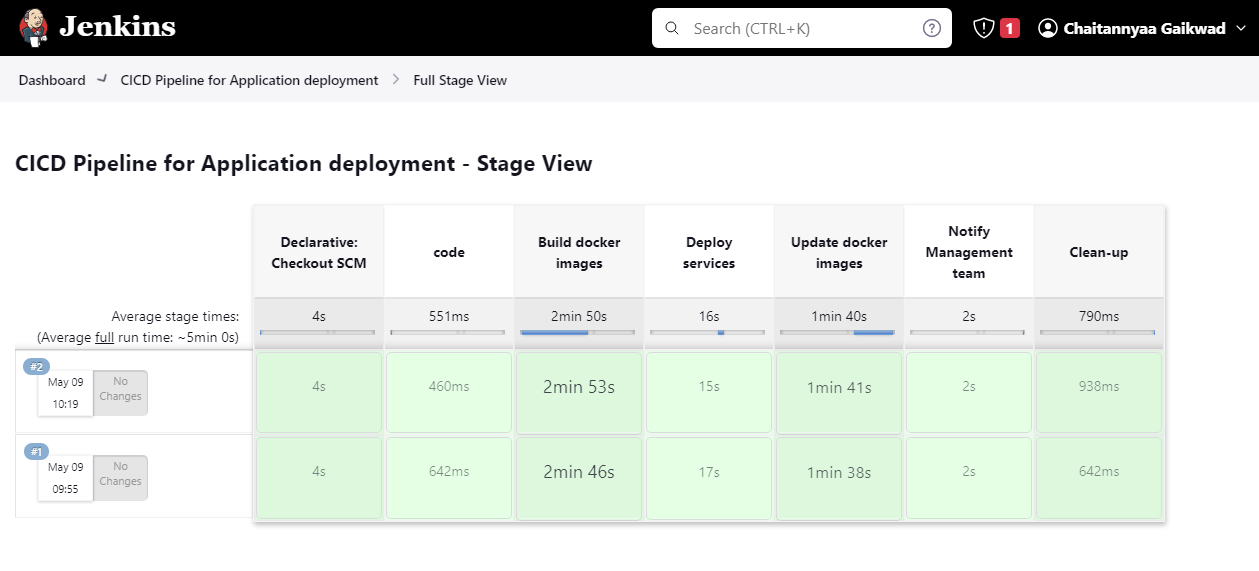
The pipeline has several stages that are executed sequentially:
"code" stage: This stage checks out the code from the GitHub repository using Git.
"Build docker images" stage: This stage builds Docker images for the different components of the multi-container application, such as worker, result, and vote.
"Deploy services" stage: This stage deploys the Docker containers for the application using docker-compose.
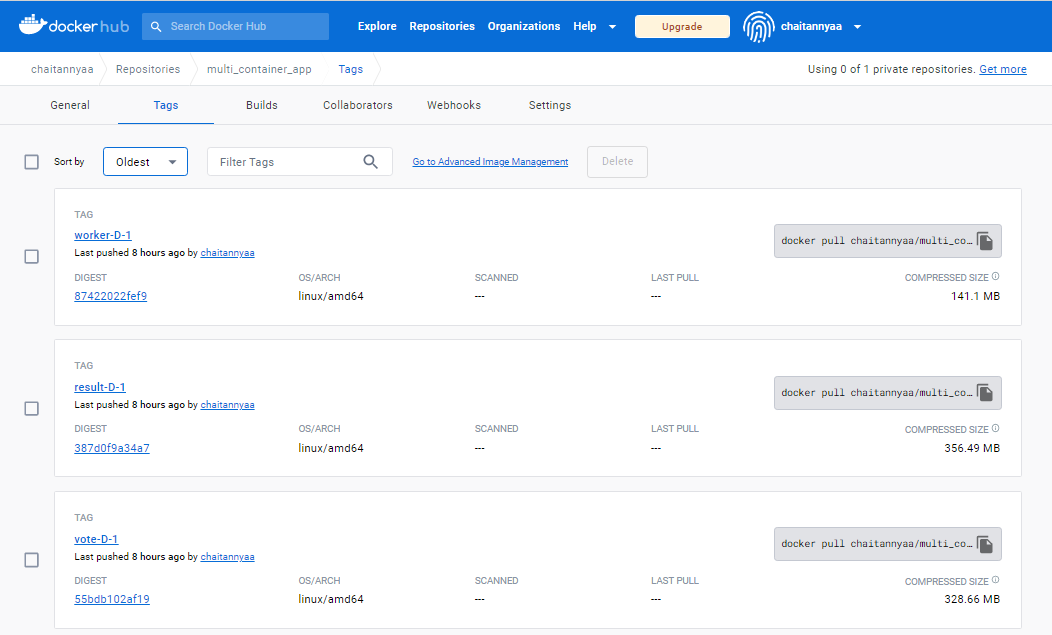
"Update docker images" stage: This stage updates the Docker images on DockerHub by pushing the newly built images.
"Notify Management team" stage: This stage sends a notification email to the management team that the microservices have been deployed successfully.
"Clean-up" stage: This stage removes all the Docker images that were built during the pipeline to clean up the system.
The pipeline is executed on an agent labeled "dev" and sets an environment variable DOCKER_IMAGE_TAG using the build number. The pipeline uses several shell scripts to perform the Docker-related tasks and sends notification emails using the 'mail' command. The pipeline also uses credentials to log in to DockerHub and push images.
Similarly, we can create a "Jenkinsfile" for other branches too.
Step 7: Run the Pipeline manually to check for any errors

The build Succeeded and we can access the Application on development-server


Step 8: Check whether the "Update docker image" and "Notify Management team" stages worked correctly or not.
Step 9: Make code changes to the production branch and commit to autostart build #2

The build Succeeded and we can access the Application on production-server
Step 10: Check whether the "Update docker image" and "Notify Management team" stages worked correctly or not.


Done!
Summary:
In this blog, we explored the significance of implementing Continuous Integration/Continuous Delivery (CI/CD) pipelines in software development. Demonstrated how to create a Declarative pipeline in Jenkins that can automatically build Docker images for updated app code and deploy them to the targeted deployment environment, notify management teams about new releases/updates, and perform clean-up for the host server.
Using CICD pipelines teams can streamline their software development processes, improve software quality, and achieve faster release cycles. By automating the repetitive and error-prone tasks of building, testing, and deployment, teams can focus on writing high-quality code and delivering value to their users.
I hope you learned something today with me!

Stay tuned for my next blog on the "Kubernetes". I will keep sharing my learnings and knowledge here with you.
Let's learn together! I appreciate any comments or suggestions you may have to improve my blog content.
Thank you,
Chaitannyaa Gaikwad


